Sign Up with Epic Games



Duplicate Along Curve — User Guide
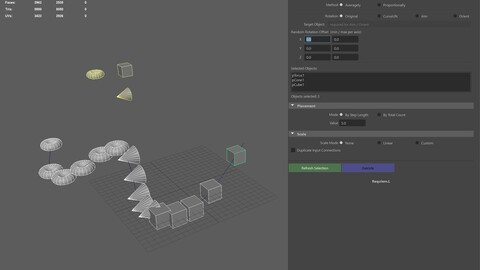
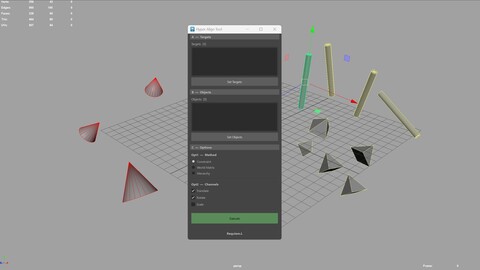
This tool duplicates one or more objects along a selected NURBS curve in Autodesk Maya, with full control over distribution, rotation, and scale.
1. Select the objects you want to duplicate, then Shift-click the target NURBS curve.
2. Click Refresh Selection in the tool window.
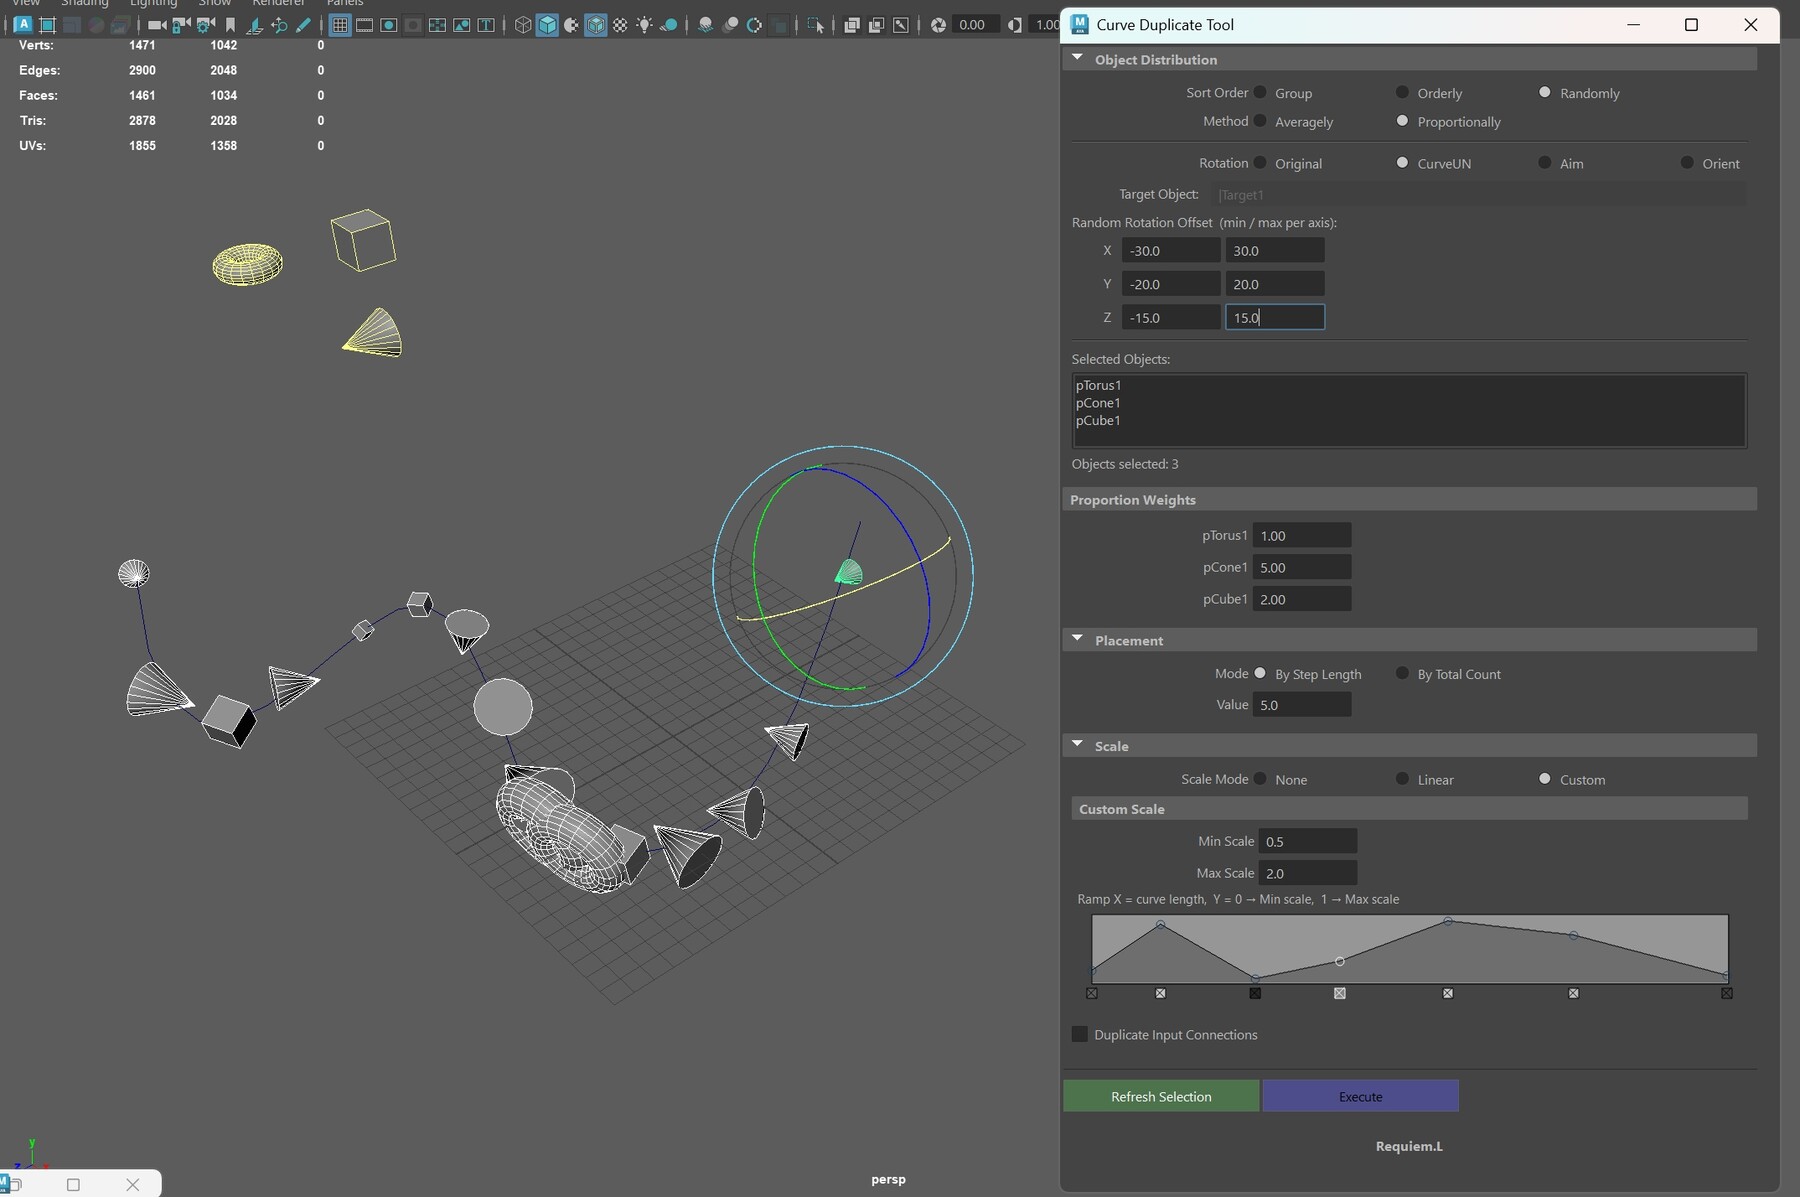
3. Adjust settings in each section as needed.
4. Click Execute to place duplicates along the curve.
Sort Order
Group
Places all copies of object A first, then all of B, then C … (AAA BBB CCC)
Orderly
Cycles through objects in order: A B C A B C A B C …
Randomly
Assigns objects in random order each time Execute is run
Distribution Method
Averagely
Each object occupies an equal share of the total duplicate count
Proportionally
Each object's share is set by the weight fields that appear below the list
Rotation
Original
Keeps the source object's rotation unchanged
CurveUN
Aligns Z-axis to the curve tangent and Y-axis to the curve normal
Aim
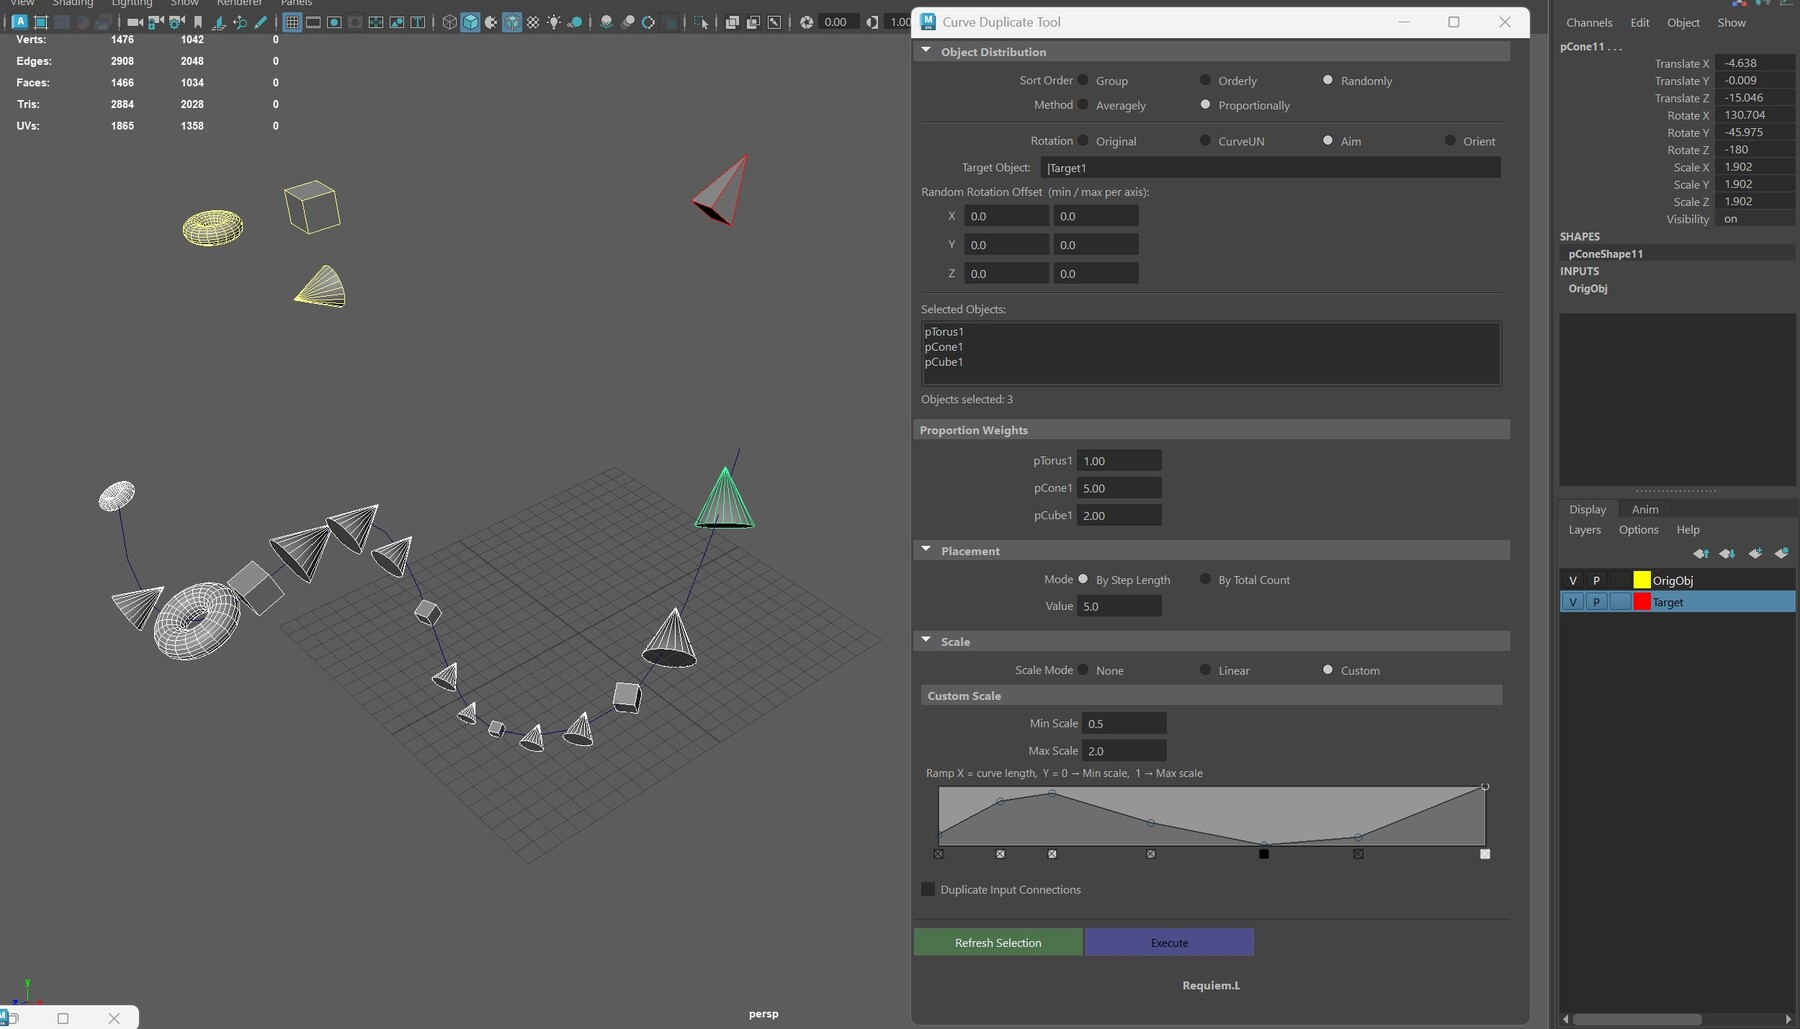
Points the Z-axis toward the specified Target Object
Orient
Matches the rotation of the specified Target Object exactly
💡 Aim and Orient modes both require a valid Target Object name to be entered in the field.
Random Rotation Offset
Adds a random Euler angle offset on each axis after the primary rotation is applied. Enter Min and Max values per axis. Set both to 0 to disable.
Object List & Proportion Weights
Click Refresh Selection to populate the list from the current Maya selection. In Proportionally mode, a weight field appears for each object — higher weights mean more copies of that object.
By Step Length
Calculates the number of copies from a fixed world-unit interval along the curve
By Total Count
Places exactly N copies, evenly spaced across the full curve length
None
No scaling is applied; duplicates keep the source object's scale
Linear
Scale interpolates linearly from Min Scale at the start to Max Scale at the end
Custom
Scale is driven by the Ramp graph: X-axis = position along the curve (0 → 1), Y-axis = 0 → Min Scale … 1 → Max Scale
💡 In Custom mode, right-click the ramp to add control points. Drag them vertically to set the scale value at that position along the curve.
Duplicate Input Connections — when checked, Maya duplicates all incoming node connections to each copy (useful for instances that rely on upstream networks).
このツールは、Autodesk Maya において選択した NURBS カーブに沿って1つ以上のオブジェクトを複製します。配置・回転・スケールを細かく制御できます。
1. 複製したいオブジェクトを選択し、最後に対象の NURBS カーブを Shift クリックします。
2. ツールウィンドウの Refresh Selection をクリックします。
3. 各セクションの設定を必要に応じて調整します。
4. Execute をクリックしてカーブに沿ってオブジェクトを配置します。
並び順 (Sort Order)
Group
オブジェクト A を全て配置した後に B、次に C … と並べます(AAA BBB CCC)
Orderly
A B C A B C … の順に繰り返します
Randomly
Execute を実行するたびにランダムな順番で割り当てます
配置方式 (Distribution Method)
Averagely
各オブジェクトが複製数を均等に分担します
Proportionally
リスト下部に表示されるウェイトフィールドの比率に従って配分します
回転 (Rotation)
Original
元オブジェクトの回転をそのまま引き継ぎます
CurveUN
Z 軸をカーブの接線方向、Y 軸を法線方向に合わせます
Aim
Z 軸を指定した Target Object の方向に向けます
Orient
指定した Target Object の回転と完全に一致させます
💡 Aim と Orient は、Target Object フィールドに有効なオブジェクト名を入力する必要があります。
ランダム回転オフセット (Random Rotation Offset)
基本の回転を適用した後、各軸にランダムなオイラー角オフセットを加えます。各軸の Min と Max を設定してください。0 を指定するとオフセットなしになります。
オブジェクトリストとウェイト
Maya で選択した状態で Refresh Selection をクリックするとリストが更新されます。Proportionally モードでは各オブジェクトにウェイトフィールドが表示され、値が大きいほど複製数が増えます。
By Step Length
カーブ上の一定間隔(ワールド単位)から複製数を自動計算します
By Total Count
指定した個数 N をカーブ全体に均等配置します
None
スケールを変更しません
Linear
カーブの始点から終点に向かって Min Scale ~ Max Scale の間で線形補間します
Custom
ランプグラフでスケールを制御します。X 軸 = カーブ上の位置(0→1)、Y 軸 = 0→Min Scale ~ 1→Max Scale
💡 Custom モードでは、ランプを右クリックしてコントロールポイントを追加できます。縦方向にドラッグしてその位置のスケール値を設定してください。
Duplicate Input Connections — オンにすると、元のオブジェクトへの入力コネクションも複製します。アップストリームのネットワークに依存するオブジェクトに有効です。
本工具用于在 Autodesk Maya 中沿选定的 NURBS 曲线复制一个或多个对象,支持对分布方式、旋转与缩放进行精细控制。
1. 选择需要复制的对象,最后按住 Shift 单击目标 NURBS 曲线。
2. 在工具窗口中点击 Refresh Selection。
3. 根据需要调整各栏参数。
4. 点击 Execute,对象将沿曲线排布。
排列顺序(Sort Order)
Group
先放置对象 A 的所有副本,再放 B,再放 C……(AAA BBB CCC)
Orderly
按 A B C A B C …… 的顺序循环排列
Randomly
每次执行时随机分配对象顺序
分布方式(Distribution Method)
Averagely
每个对象均等分配总复制数量
Proportionally
按列表下方各对象的权重字段比例分配数量
旋转(Rotation)
Original
保持源对象的旋转不变
CurveUN
将 Z 轴对齐曲线切线方向,Y 轴对齐曲线法线方向
Aim
将 Z 轴指向指定的目标对象(Target Object)
Orient
完全匹配指定目标对象的旋转
💡 Aim 和 Orient 模式均需在字段中输入有效的目标对象名称。
随机旋转偏移(Random Rotation Offset)
在基础旋转应用后,为各轴叠加随机欧拉角偏移。为每轴设置 Min 和 Max 值,均设为 0 则不启用偏移。
对象列表与比例权重
在 Maya 中完成选择后点击 Refresh Selection 更新列表。Proportionally 模式下,每个对象下方会出现权重输入框,数值越大,该对象的复制数量越多。
By Step Length
按指定的世界单位步长自动计算复制数量
By Total Count
将指定数量 N 个副本均匀分布在曲线全长上
None
不应用任何缩放,副本保持源对象尺寸
Linear
从曲线起点到终点,在 Min Scale 与 Max Scale 之间进行线性插值
Custom
通过曲线图(Ramp)控制缩放:X 轴 = 曲线上的位置(0→1),Y 轴 = 0→Min Scale,1→Max Scale
💡 Custom 模式下,在曲线图上右键单击可添加控制点,上下拖动设定该位置处的缩放值。
Duplicate Input Connections — 勾选后,将同时复制源对象的所有输入节点连接,适用于依赖上游节点网络的对象。
CATEGORIES
Standard Use License
USD $5.00
License: Standard License
Stock Assets
For personal use and one commercial project (up to 2,000 sales or 20,000 views).
TutorialsOne copy to be used by a single user.
Installable ToolsOne installation by a single user.
Learn MoreFiles (1)
https://artstn.co/m/7ro8d
Copied
More by Requiem.L
Add a tip for Requiem.L
Tips are appreciated, but optional!