Sign Up with Epic Games


ENGLISHOverview
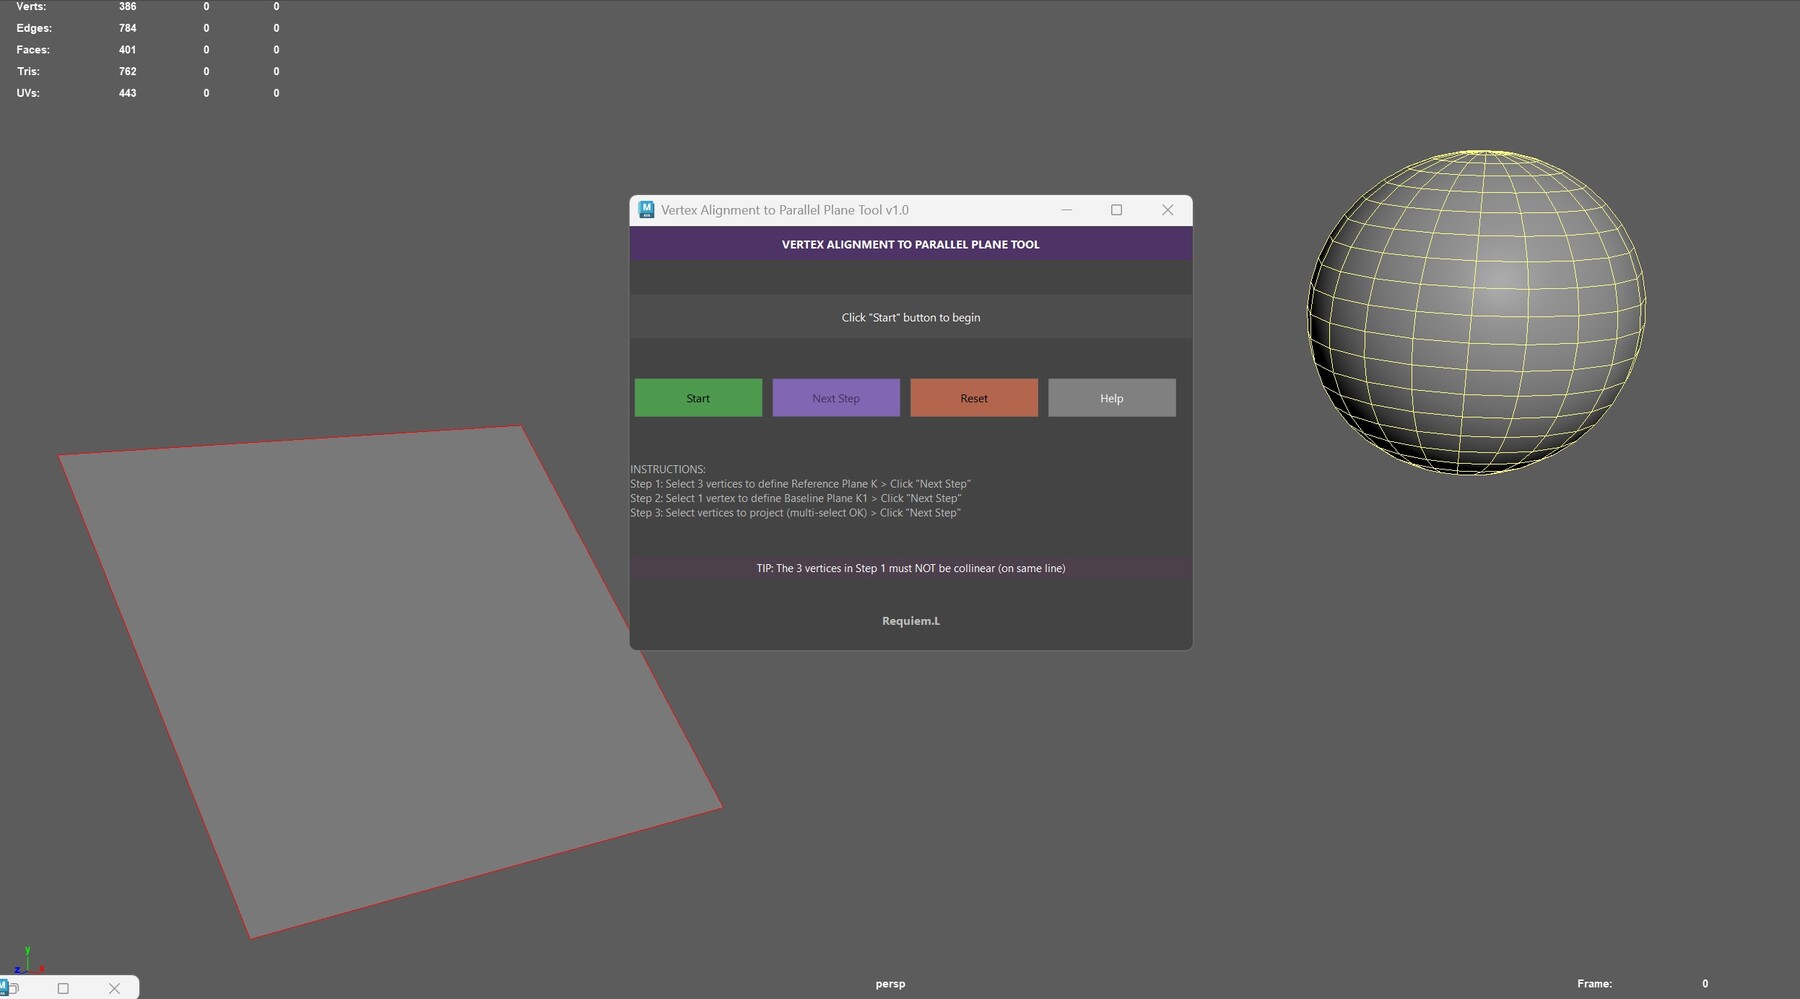
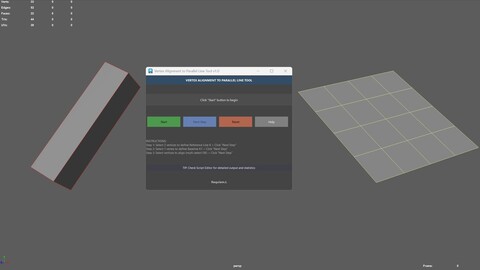
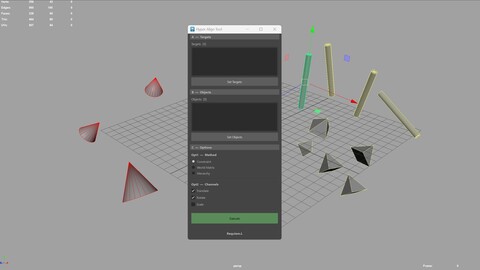
Vertex Align to Plane is a Maya tool that projects selected vertices onto a plane parallel to a reference plane. Each vertex moves perpendicularly until it lies on the baseline plane, creating perfectly flat surfaces.
Key Features- ✅ Planar Projection - Flatten vertices to a perfect plane (2D surface)
- ✅ Intuitive UI - Easy-to-use floating window with step-by-step instructions
- ✅ Non-blocking - Continue working in the viewport while the tool window is open
- ✅ Mathematical Precision - Uses plane normal and dot product for accurate results
- ✅ Detailed Statistics - View projection distances and operation details
- ✅ Undo Support - Full Maya undo/redo compatibility
- Flatten uneven surfaces
- Create perfectly flat faces
- Align vertices to same plane
- Fix warped geometry
- Prepare surfaces for UV mapping
- Hard surface modeling cleanup
- Architectural modeling precision work
- Download vertex_align_to_plane.py
- Open Maya's Script Editor (Windows → General Editors → Script Editor)
- Switch to Python tab
- Copy and paste the entire script
- Press Ctrl+Enter to execute
Optional: Drag the script to your shelf for one-click access
How to UseStep 1: Click "Start" button in the tool window
Step 2: Select 3 vertices (A, B, and C) to define Reference Plane K
- These vertices determine the plane orientation
- IMPORTANT: The 3 vertices must NOT be collinear (on same line)
- They should form a triangle
- Click "Next Step"
Step 3: Select 1 vertex (D) to define Baseline Plane K1
- K1 will be parallel to K and pass through this vertex
- Vertex D can be A, B, C, or any other vertex
- Click "Next Step"
Step 4: Select vertices to project (multi-select allowed)
- Hold Shift to select multiple vertices
- Click "Next Step" to execute projection
Done! Check the Script Editor for detailed statistics.
Tips- Use F8 to quickly enter vertex mode
- The 3 vertices in Step 2 must form a triangle, not a line
- The tool works in world space coordinates
- Use Ctrl+Z to undo projection if needed
- Check Script Editor for detailed output
Problem: "Vertices are collinear" error
Solution: The 3 selected vertices are on the same line. Choose 3 vertices that form a triangle instead.
Problem: "Must select exactly 3 vertices"
Solution: Ensure you're in vertex mode (F8) and have selected exactly 3 vertices in Step 1.
Problem: Vertices don't move
Solution: The vertices might already be on the baseline plane. Check the statistics in Script Editor.
<a name="日本語"></a>
日本語概要Vertex Align to Planeは、選択した頂点を参照平面に平行な基準平面に投影するMayaツールです。各頂点は垂直方向に移動し、完全に平らな表面を作成します。
主な機能- ✅ 平面投影 - 頂点を完璧な平面(2D表面)に平坦化
- ✅ 直感的なUI - ステップバイステップの説明付きフローティングウィンドウ
- ✅ ノンブロッキング - ツールウィンドウを開いたままビューポートで作業可能
- ✅ 数学的精度 - 平面法線とドット積による正確な結果
- ✅ 詳細な統計 - 投影距離と操作の詳細を表示
- ✅ アンドゥ対応 - Mayaの取り消し/やり直しに完全対応
- 不均一な表面の平坦化
- 完璧に平らな面の作成
- 頂点の同一平面への整列
- 歪んだジオメトリの修正
- UVマッピング用の表面準備
- ハードサーフェスモデリングのクリーンアップ
- 建築モデリングの精密作業
- vertex_align_to_plane.py をダウンロード
- Mayaのスクリプトエディタを開く(ウィンドウ → 一般エディタ → スクリプトエディタ)
- Pythonタブに切り替え
- スクリプト全体をコピー&ペースト
- Ctrl+Enterで実行
オプション: スクリプトをシェルフにドラッグしてワンクリックアクセス
使い方ステップ1: ツールウィンドウの**「Start」**ボタンをクリック
ステップ2: 3つの頂点(A、B、C)を選択して参照平面Kを定義
- これらの頂点が平面の向きを決定
- 重要: 3つの頂点は共線(同一線上)であってはいけません
- 三角形を形成する必要があります
- **「Next Step」**をクリック
ステップ3: 1つの頂点(D)を選択して基準平面K1を定義
- K1はKに平行で、この頂点を通過
- 頂点DはA、B、C、または他の任意の頂点
- **「Next Step」**をクリック
ステップ4: 投影する頂点を選択(複数選択可)
- Shiftキーを押しながら複数の頂点を選択
- **「Next Step」**をクリックして投影を実行
完了! スクリプトエディタで詳細な統計を確認できます。
ヒント- F8キーで素早く頂点モードに入る
- ステップ2の3つの頂点は三角形を形成し、線上にあってはいけません
- ツールはワールド空間座標で動作
- 必要に応じてCtrl+Zで投影を取り消し
- 詳細な出力はスクリプトエディタで確認
問題: 「Vertices are collinear」エラー
解決策: 選択した3つの頂点が同一線上にあります。三角形を形成する3つの頂点を選択してください。
問題: 「Must select exactly 3 vertices」エラー
解決策: 頂点モード(F8)でステップ1で正確に3つの頂点を選択していることを確認してください。
問題: 頂点が動かない
解決策: 頂点が既に基準平面上にある可能性があります。スクリプトエディタの統計を確認してください。
<a name="中文"></a>
中文概述**Vertex Align to Plane(顶点对齐到平面)**是一个Maya工具,可将选定的顶点投影到与参考平面平行的基准平面上。每个顶点沿垂直方向移动,创建完美平坦的表面。
主要功能- ✅ 平面投影 - 将顶点压平到完美平面(2D表面)
- ✅ 直观的UI - 带有分步说明的易用浮动窗口
- ✅ 非阻塞 - 工具窗口打开时可继续在视口中工作
- ✅ 数学精度 - 使用平面法线和点积确保准确结果
- ✅ 详细统计 - 查看投影距离和操作详情
- ✅ 撤销支持 - 完全兼容Maya的撤销/重做功能
- 压平不平整的表面
- 创建完美平坦的面
- 将顶点对齐到同一平面
- 修复扭曲的几何体
- 为UV映射准备表面
- 硬表面建模清理
- 建筑建模精密工作
- 下载 vertex_align_to_plane.py
- 打开Maya的脚本编辑器(窗口 → 常规编辑器 → 脚本编辑器)
- 切换到 Python 标签页
- 复制并粘贴整个脚本
- 按 Ctrl+Enter 执行
可选: 将脚本拖到工具架以实现一键访问
使用方法步骤1: 点击工具窗口中的 "Start" 按钮
步骤2: 选择 3个顶点(A、B和C)定义参考平面K
- 这些顶点决定平面方向
- 重要: 3个顶点不能共线(在同一条线上)
- 它们应该形成一个三角形
- 点击 "Next Step"
步骤3: 选择 1个顶点(D)定义基准平面K1
- K1将平行于K并通过此顶点
- 顶点D可以是A、B、C或任何其他顶点
- 点击 "Next Step"
步骤4: 选择 要投影的顶点(可多选)
- 按住Shift键选择多个顶点
- 点击 "Next Step" 执行投影
完成! 在脚本编辑器中查看详细统计信息。
提示- 使用 F8 快速进入顶点模式
- 步骤2中的3个顶点必须形成三角形,不能在同一条线上
- 工具在 世界空间 坐标系中工作
- 如需撤销投影,使用 Ctrl+Z
- 在脚本编辑器中查看详细输出
问题: 出现"Vertices are collinear"错误
解决方案: 选择的3个顶点在同一条线上。请选择形成三角形的3个顶点。
问题: 出现"Must select exactly 3 vertices"错误
解决方案: 确保处于顶点模式(F8)并在步骤1中选择了恰好3个顶点。
问题: 顶点不移动
解决方案: 顶点可能已经在基准平面上。检查脚本编辑器中的统计信息。
CATEGORIES
Standard Use License
USD $3.00
License: Standard License
Stock Assets
For personal use and one commercial project (up to 2,000 sales or 20,000 views).
TutorialsOne copy to be used by a single user.
Installable ToolsOne installation by a single user.
Learn MoreFiles (1)
https://artstn.co/m/7rBky
Copied
More by Requiem.L
Add a tip for Requiem.L
Tips are appreciated, but optional!